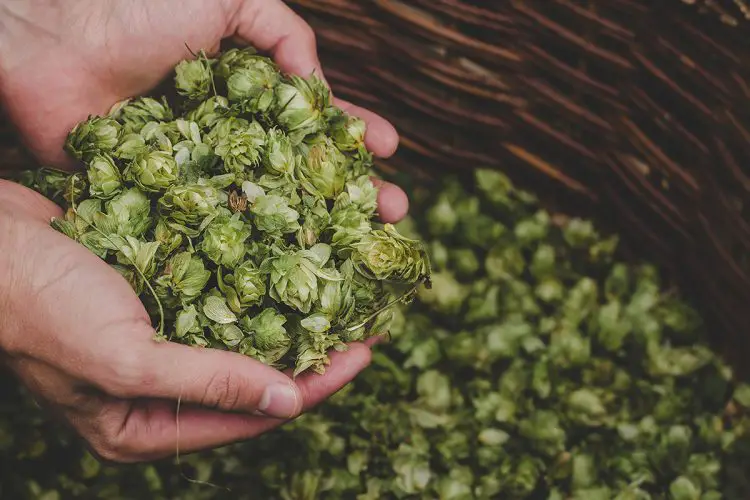
Around August to September, the buzz surrounding hops in brewing circles intensifies. This seasonal hopping madness is not accidental but rather coincides with the annual hop harvest.
So what is dry hopping? Why go this route? More importantly, how do you dry hop beer?
We have covered all these essential questions and more in our ultimate guide on how to dry hop beer.
What is Dry Hopping?
Before we jump right to the process, it is worth briefly going over what it means to dry hop beer.
Dry hopping is a brewing technique rather than a description of the condition of the hops at the time of use. Fresh hops have a very short lifespan (typically 24 hours) and need to be dried to preserve them for up to 3 years. Hops are also seasonal and harvested once a year.

Dry hopping is a brewing technique specifically concerned with the point in the brewing process that the hops are added to the wort.
There are different occasions when hops are added to the brew, with each addition having a different effect on the final taste of the beer.
The first stage is adding hops during the boiling process. Here, the beta acids and essential oils in the hops evaporate, while the alpha acids dissolve into the wort. This process is what contributes to the bitterness of the eventual brew.
As the hops are added later in the process, the alpha acids responsible for the bitterness of the beer do not dissolve quite as well as during the boil. Here, the beta acids and volatile essential oils responsible for aromas infuse and stay in the final beer.
In short, dry hopping or adding hops post-boil such as in the fermentation vessel infuses aromas into the beer without increasing its bitterness.
The aroma of dry-hopped beer is often described as herbal, grassy, and resiny. The aroma of the beer elevates its flavor since much of a beer’s taste comes from its scent.
How to Dry Hop Beer Step-by-Step
Now we get to the fun part, how to dry hop beer.
1. Choose Your Hops
The main thing that you need to keep in mind when choosing hops for dry-hopping is that you are adding flavor and aroma rather than bitterness.
Hops with low to medium alpha acid levels seem to be the best choice in this case. Less than 6% alpha acid levels is a safe bet to maximize aromas and flavors while minimizing bitterness.
The simplest option is to look for the ‘flavor and/or aroma hops’ label on your hops. These varieties tend to have a higher percentage of volatile aromatic oils that will infuse the hoppy aroma and flavor you are shooting for.
Pellets or Whole Hops?
Although there is no hard and fast rule about pellets vs. whole hops for dry hopping, the former is often the easier option.
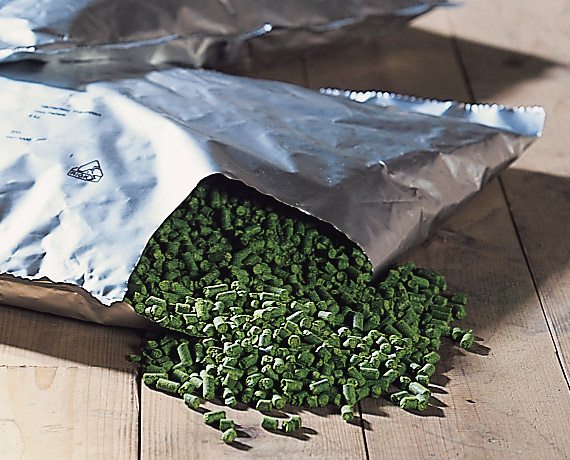
Both pellet hops and whole hops float to the surface but the pellets sink over time. You want as much surface area of the hops coming into contact with the brew as possible which is easier to achieve with pellet hops.
Pellet hops also come with ruptured lupulin glands where the essential oils that infuse flavor and aroma come from. These hop oils from the pellets begin to infuse into the beer almost immediately, a process that takes much longer with whole hops.
2. Dry hop During Primary or Secondary Fermenting?
There is a raging debate on whether it is necessarily a bad thing to dry hop during the primary fermentation.
Most homebrewers prefer to dry hop in the secondary fermenter rather than during the primary stage. The vigorous fermentation process in the primary stage tends to ‘scrub’ out the aroma if you add the hops in too soon.
The general consensus is to at least wait until the vigorous CO2 bubbling during the primary fermentation has receded before adding in aromatic hops.
Another advantage of dry hopping during the secondary fermentation is the wort has a lower pH, less oxygen content, and higher alcohol content all of which make bacterial contamination almost impossible.
3. Choose the Perfect Timing
The best time to dry hop beer is 5-7 days before bottling. There is no additional benefit of dry hopping for more than a week. Leaving the hops in for too long may result in an undesirable grassy taste.
Dry hopping works best with cool beer so try to keep the temperature in the low to mid 60°F range.
4. Measure Out Your Hops

How much hops to use entirely depend on the kind of beer you are brewing and the taste you are after.
As a general rule:
American pale ales: 0.5 to 1 ounce per 5-gallon batch
IPAs: 2-4 ounces per 5-gallon batch
Double IPAs: 2-4 ounces per 5-gallon batch
Don’t be afraid to experiment with the quantities or deviate slightly from your recipe. Tasting your hops before putting them in should give you an idea of the final taste of the beer.
5. Drop in the Hops
You could just drop in the hop pellets but this method might be a nightmare to clean up later. The hops flocculate along with the yeast once inside the brew and stick to the sides of your container.
Place the pellets in a fine mesh bag, weigh the bag down with sanitized marbles, and drop it into your brew. Allowing the bag to sink to the bottom from the beginning maximizes the hop’s exposure to the beer.

Be sure to boil the hop bag before insertion to sanitize it.
Drop the hops gently to avoid introducing oxygen into your beer. You want as little splashing as possible.
Using a carboy can be a little tricky especially when trying to get the hop bag out. The hops expand as they absorb beer and maybe impossible to get out through the narrow opening or a carboy.
In this case, use a carboy with an extra-large top or opt for a fermentation bucket. In any case, you can always pour in the hops directly and rack later when bottling.
6. Wait
Close the secondary fermenter and allow the hops to steep for up to 7 days. The flavor will continue to intensify the longer the hops stay inside the brew.
Avoid opening the fermenter if you can help it otherwise you may distabalize the oxygen and carbon dioxide in the beer.
Again, you shouldn’t see much difference in flavor after a week and the flavor may turn unpleasant after 2 weeks.
7. Remove the Hops
The final step is to remove the hops. This process is much easier with a hop bag. Simply remove the bag from the beer and throw it away.
Alternatively, use a mesh basket to strain the beer and collect loose hops stuck at the bottom if you didn’t use a bag.
8. Evaluate the Results
Don’t be disheartened if the flavor isn’t quite to your liking. Make a mental note of how much hops you used, the type, and use this information to tweak your recipe depending on whether the flavor is too strong or too mild.
9. Bottle Your Beer
Finally, bottle or keg your beer as soon as possible to maintain its flavor and freshness.
Final Thoughts on Dry Hopping
Dry hopping isn’t difficult as it may sound at first and can add intense hoppy aroma and flavor to your beer. Again, don’t be afraid to experiment with whole hops, pellet hops, and even plug hops as you refine your recipes.
As a final thought, you don’t need to worry about contaminating your brew by adding in un-sanitized hops. Hops provide a very poor environment for bacteria to grow on.
0 Comments
How to Ferment Beer: A Step-by-Step Guide - Brew Fuse
[…] Secondary fermentation simply involves transferring your fermented beer to a secondary fermentation vessel, usually a glass carboy. The beer sits in the secondary vessel for anywhere from two days to several months. This is typically the stage where homebrewers will dry hop beer. […]