
-
Ease of Use - 95%95%
-
Performance - 100%100%
-
Cost - 90%90%
-
Features - 90%90%
Summary
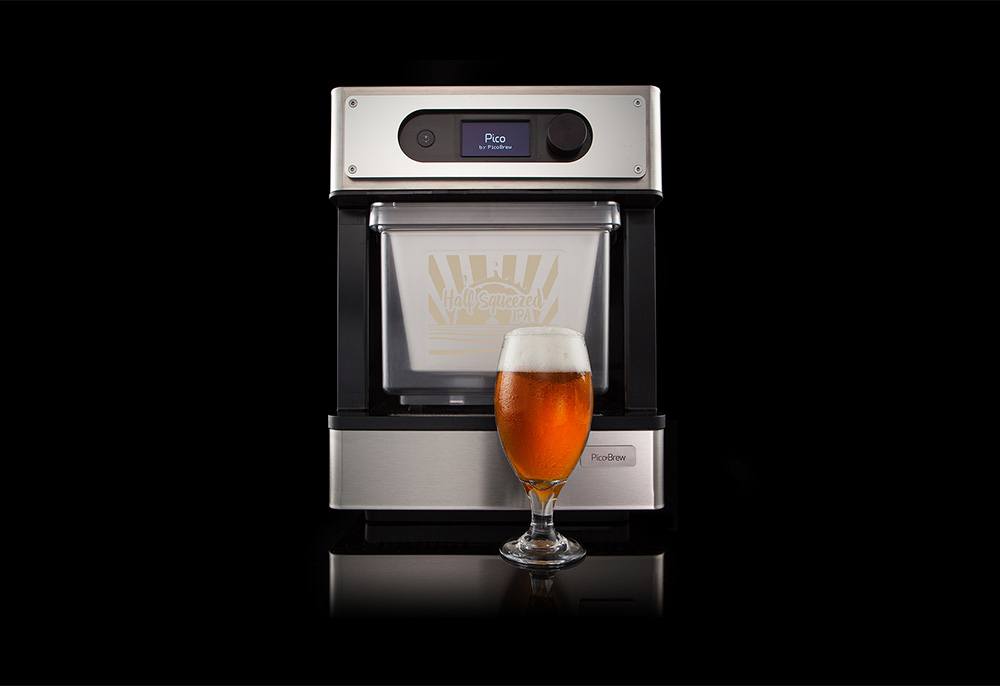
PicoBrew is at the forefront of the auto brewing industry with their entry-level Pico. Impressive performance, unique beer recipes from around the world, and still remarkably fun for being “automated.”
PicoBrew has a rather interesting start-up story consisting of two beer-loving brothers – one, a food chemist and physicist, and the other a former Microsoft executive. Their initial creation was the patented and award winning PicoBrew Zymatic which improved the precision and quality of small to medium scale brewing around the world. The brothers took homebrewing to an even further level by introducing Zymatic’s younger brother, Pico.
Pico was created with the novice in mind; people who don’t even know the ingredients that go into beer can open this device, follow the step by step instructions, and brew their own beer. Much of the simplicity is attributable to the “pod-like” system (PicoPak) it uses for the grain and hops (people often compare it to a K-cup, but it’s not quite the same). Even with the machine automating a bunch of the initial brewing steps, you still have to be very involved throughout the entire brewing cycle and still get to experience the magic of the homebrewing hobby.
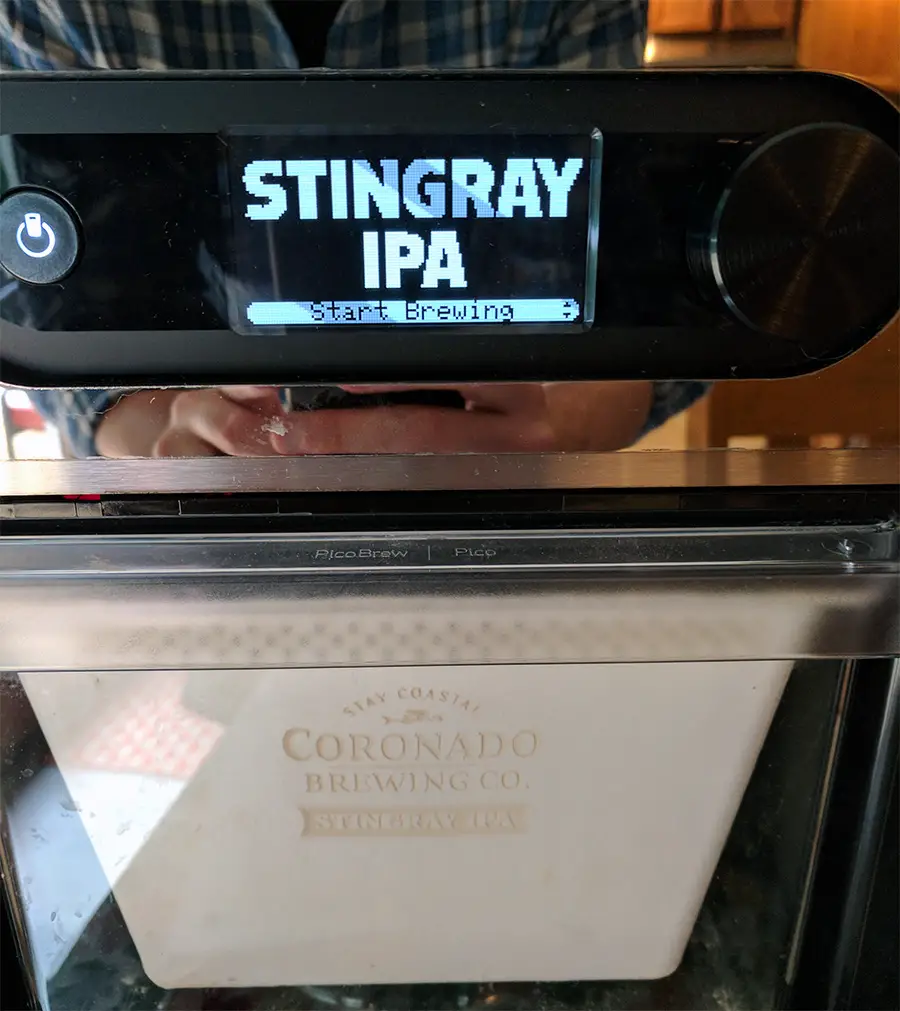
Perhaps one of the most often overlooked features of the Pico, and its PicoPaks, is being able to brew specific beers from your favorite breweries across the country. My first brew with the Pico was a Stingray IPA from Coronado Brewing in California. I live in on the east coast, where Coronado is rarely sold, so this feature alone is a truly incredible way to try new beers from all over the world.
With that said, we’ll take a deeper look into the Pico, brew our first beer with the system, and compare it to other automated brewing systems on the market. But first, let’s open the box!
Unboxing and Design
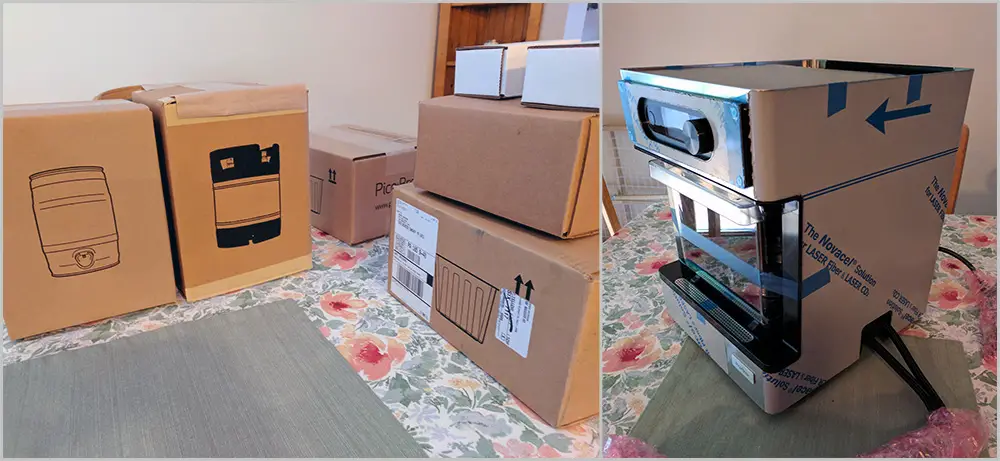
I came home from work to find my Pico sitting on my doorstep in a rather large, slightly heavy box. Inside the box, you’ll find boxes, and more boxes. Each one will contain the following pieces:
- Pico brewing system – this is the main piece of your purchase. Get ready: you’ll have to pull off tons of protective tape!
- Accessories – smaller brewing accessories including keg wands, cleaning equipment, Co2 regulator (if purchased), etc.
- PicoPaks – the hop/grain pods that are placed inside the machine.
- Brew keg – the heavier duty keg that you use to brew and ferment your beer.
- Serving keg – the lighter keg that is used to carbonate and serve beer.
The overall appearance of the Pico is impressive and can surely sit atop your countertop while blending in with other stainless steel appliances. The brewing machines sits at approximately 16” x 12” x 14” and weighs just over 30lbs, making it smaller than most microwaves. However, if you’re like me and countertop space is limited, finding another dedicated spot for the machine is pretty easy to do.
Features & Specs at a Glance
Brewing Batch Size: 1.3 gallons
Brew Time: 2-3 hours
Heater: 1500w, 90F – 205F temperature range
WiFi Connectivity
Step by Step Guide to Brewing Beer with Pico
Setup
Once you’ve decided on a brewing area, the overall setup process is very straightforward by simply following the on-screen instructions. The first step was to connect it to my WiFi and let it download a few updates. Next on the list is to complete the initial rinse.
Pico Initial Rinse
The first thing to remember when homebrewing is that sanitation and cleanliness is key to good beer. The wrong bacteria can ruin tons of beer, so make sure you do not skip this. A great way to always remember to clean your equipment is to think of it as an actual step in the brewing process.
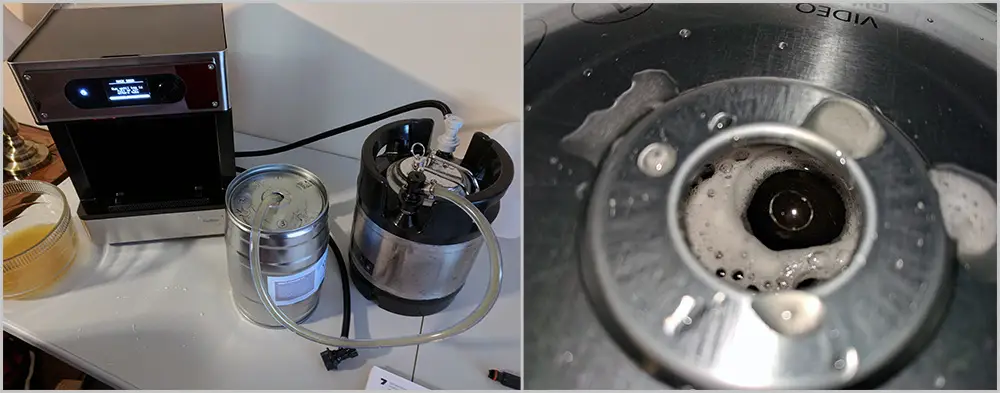
Simply select First Rinse from the Pico menu and follow the instructions. This will heat up the unit and run tap water throughout the system to flush it and sanitize it. Here is the first rinse in action:

Brewing
Now that your Pico is clean as a whistle, it’s time to brew your first beer. Even though the actual brewing time is only 2 hours or so, the entire process ends up taking about 10 days before you can begin enjoying your beer, mainly due to fermentation times.
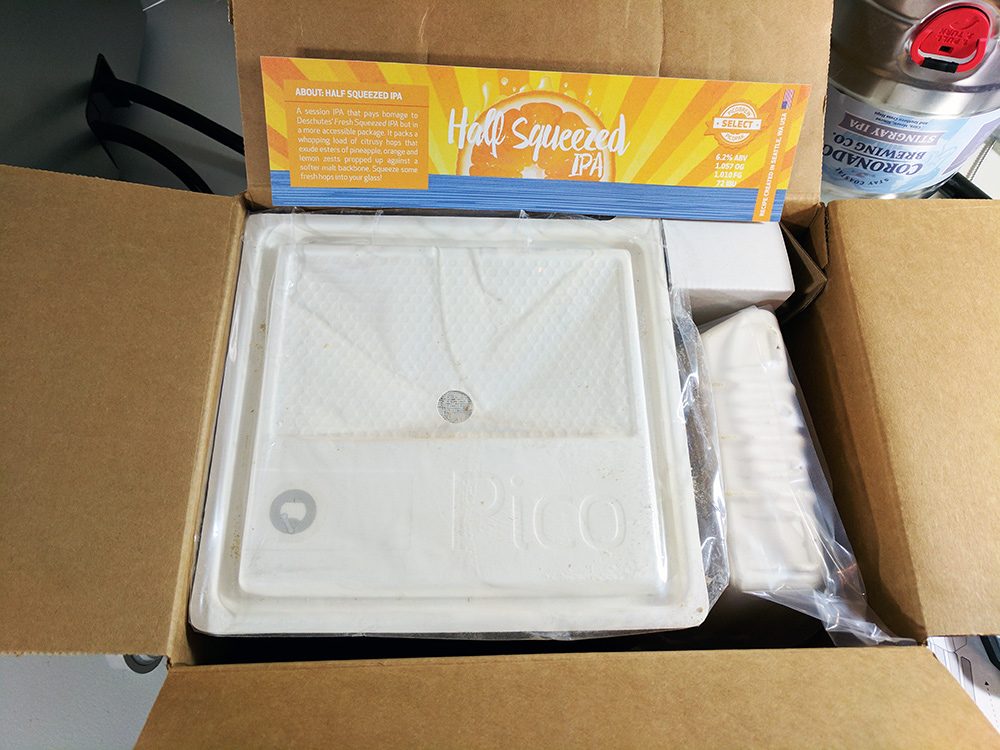
The first step to begin brewing is to unwrap your PicoPak – smell those amazing hops – and then place it into the Step Filter. The lid of the Step Filter will line up with the holes in the PicoPak. This allows water to enter the PicoPak during the brewing phase. Once you have the PicoPak in place, add 1 gallon and 6 cups of distilled water to the brewing keg, place the rubber keg seal back on, and slide the keg cozy over the entire keg (this helps insulate the keg while it brews).
The final step is to attach the Pico hoses to the brewing keg. It’s important to ensure you have the correct ones on each side! The gray ball lock connector goes onto the keg post marked as “IN”, while the black ball lock connector goes onto the keg post marked as “OUT”.
Depending on which PicoPak you’re brewing, you may have the on-screen option to adjust the beer’s alcohol percentage and bitterness. The first beer I brewed with my Pico was the Coronado Stringray IPA, which did not have the customization option. Since this is a specific brewery’s recipe, they do not want you to change it, as it can obviously affect the overall taste of the beer. However, the Half Squeezed IPA from PicoBrew did have the option to change ABV and bitterness – and if you’re anything like me, I’m cranking those suckers to the max.
Once you click start, the Pico machine will begin cycling through various stages of the brew process including mashing and hopping before finishing up between 2-3 hours. The Pico was a bit louder than I had originally imagined, due to the steaming and draining of water, but nothing crazy. Also, one of the coolest features of this machine is being able to log onto picobrew.com and track the progress of the brew.
After Brewing
As soon as the brewing is complete, you can disconnect the ball lock connectors from both keg posts and carefully remove the keg cozy (it will be hot!). Set the keg aside somewhere safe for 24 hours to let the wort cool to room temperature and begin following the instructions to clean the Pico.
Fermentation
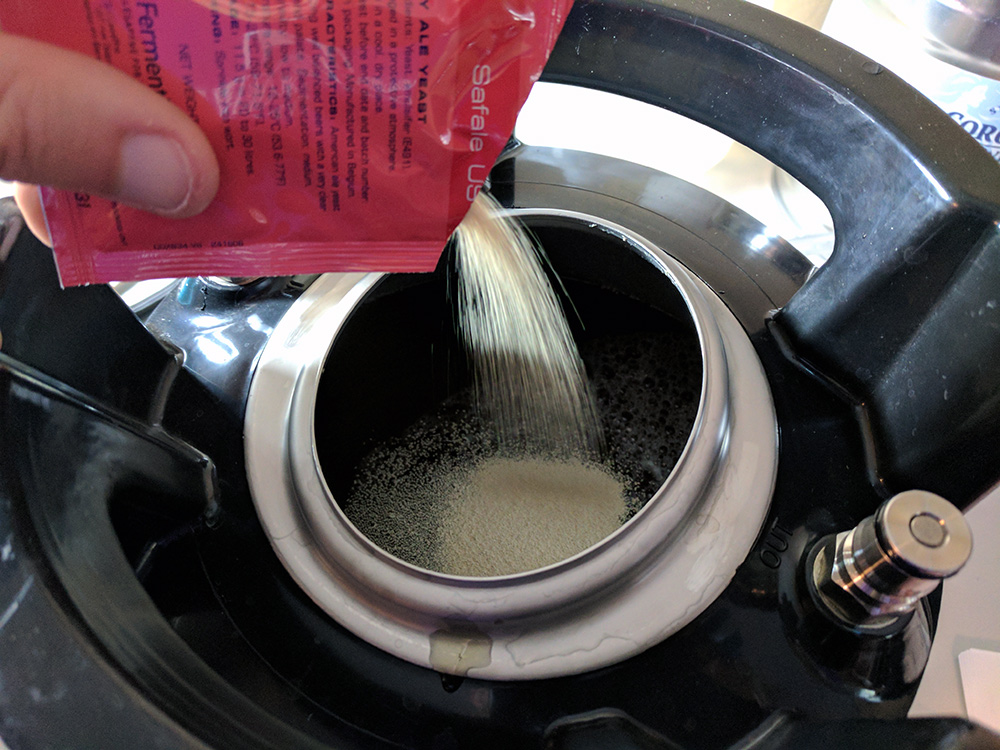
Once the wort is cooled, place the included temperature decal on the side of the keg – after about 20 minutes, you should have a good indication of the temperature, which becomes important in the paragraph below. Now you can give the wort a quick stir to help aerate it, open the keg seal, and pour in the provided yeast packet (red bag).
There are two different methods for completing fermentation with the Pico system: fast fermentation or standard fermentation. I know what you’re probably thinking – why wouldn’t I go the fast route? Well, your decision actually depends on the air temperature where your keg will be placed to ferment. Warmer temperatures (75F – 84F) are ideal for the fast fermentation, while cooler temperatures (61F – 73F) are better suited for standard fermentation. Personally, I have central AC set to around 71F regularly, but my basement stays much cooler. So I chose to ferment my beer in the basement while using the standard fermentation since my air temperature was right in the middle of the standard range. If your house is expected to be a bit warmer, you can probably go with the fast fermentation. Let’s break down the differences and steps a little further.
Note: If you have a fermentation fridge, all the better!
Method 1: Fast Fermentation
Locate the metal keg lid and the red fast fermentation adapter that came with your Pico kit. The red adapter screws onto the metal keg lid where the pressure release valve is – simply unscrew the valve and put the red adapter in its place. Then you can put the keg lid back on and shake the entire keg pretty hard for a few minutes to help activate the yeast. Here are the average temperature and time ranges for fast fermentation:
| Keg Temperature | Days to Fast Ferment |
| 75-84 | 5 |
| 70-74 | 5-6 |
| 65-69 | 6-7 |
Method 2: Standard Fermentation (my choice)
One thing I really like about using the standard fermentation method is that the steps are exactly the same as traditional homebrewing – no fancy adapters. You can also watch the air bubbles escape during fermentation and really get a feel of your beer transforming.
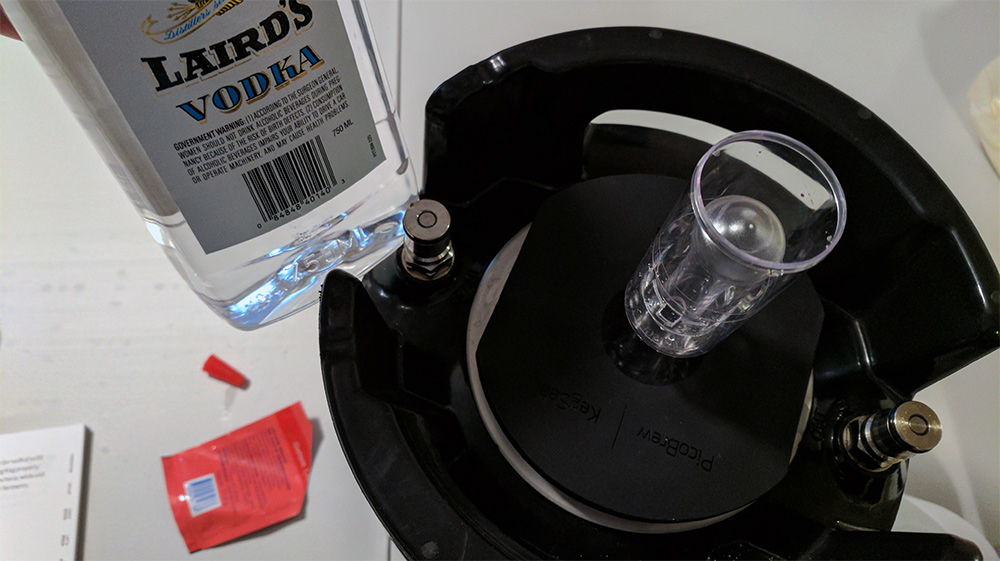
The standard route uses the black keg seal instead of the metal keg lid and red adapter, so you can toss those to the side if you’re using this method. I grabbed the plastic airlock, filled it with vodka, and plugged it into the keg seal hole. Everything was well and good for about a day, until my beer started fermenting like crazy – so much that it started spilling some krausen out of the airlock. If this happens, it’s not necessarily an issue, in fact it’s a sign of healthy fermentation, but you do want to make sure to clean it up so it doesn’t block air flow. I created a quick guide if your Pico airlock fills with foam. Keep an eye on the frequency of the bubbles as time goes on – once the bubbles become really spaced out or stop altogether, it should be time. Most standard fermentations take about 10 days, which is exactly how long I waited (bubbles slowed down to once every ~25 seconds).
Dry Hopping
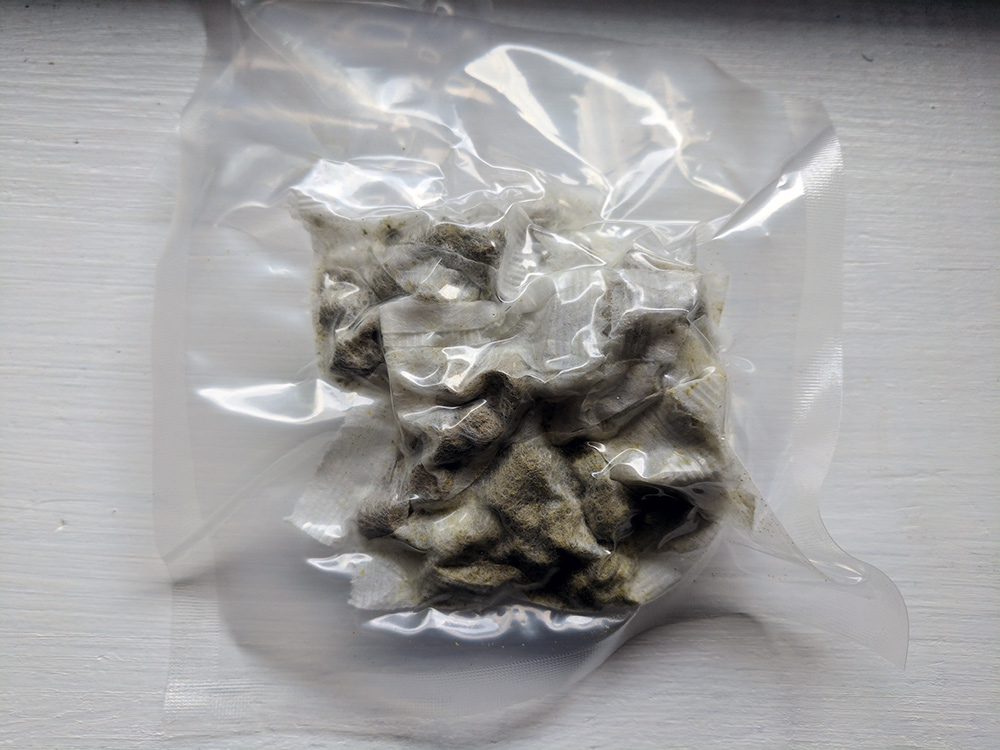
Dry Hopping is an optional step, but often recommended, especially if you have a traditionally hoppy beer type such as IPA. Depending on which PicoPak you’re brewing, you may see a sachet of vacuum sealed hops inside the box. If so, it’s recommended to place these in your refrigerator on day 1 of fermenting (I believe these are placed in the fridge to help prevent as much bacteria as possible from coming into contact with it, since you will be tossing these bad boys right into your beer).
After 3 days of fermenting, pull the dry hops out of the outside plastic bag (do not pull the actual hops out of the little sachets) and drop them right into your keg of beer. Now you can continue fermenting for at least 4 days with the added hops.
Racking
Racking is the process of transferring your beer from the brewing keg to the serving keg. The entire process is very easy to do by following Pico’s on screen instructions, but there is one thing I’d like to point out. They recommend to dispose of some of the initial beer into a waste container as it may contain trub (sediment). My beer did not have any trub coming out, so it’s important not to get too hung up on this step and waste a lot of beer expecting to find a lot of trub. Sometimes your beer will not have any.
I continued transferring the beer to the serving keg until it was within 1” from the top. It’s difficult to actually see in the serving keg to see how full it is, but I was able to shine my phone’s flashlight into the hole enough to get an idea of how full it was. A few reviews I read indicated that the full brewing keg transferred over into the serving keg before reaching the top, so they didn’t have to worry about overfilling. I, on the other hand, did have to manually stop the flow in order to prevent overfilling it.
Carbonating
Similar to the fermenting stage, your PicoBrew beer will have two methods of carbonating: forced or keg conditioning. 9 times out of 10 I will use forced carbonation, simply because you can save a ton of time (we’re talking ~20 days).
Forced Carbonation
While working with CO2 canisters can be a bit nerve wracking, it’s definitely worth it to save so much time on the brewing cycle. To do so, grab the regulator and MAKE SURE IT’S CLOSED – turn it counterclockwise until it no longer turns. Grab one of the supplied 5g CO2 canisters and quickly screw it onto the regulator. You may hear a brief hiss as air escapes.
I then placed the CO2 regulator into the top opening of the serving keg, dialed it to 24 PSI (which is the max it will allow you to go), and placed it in the fridge for a day and a half.
Keg Conditioning
If you’re a weirdo that takes the scenic route, you can simply pour the supplied packet of sugar into the serving keg prior to racking.
Let’s Drink
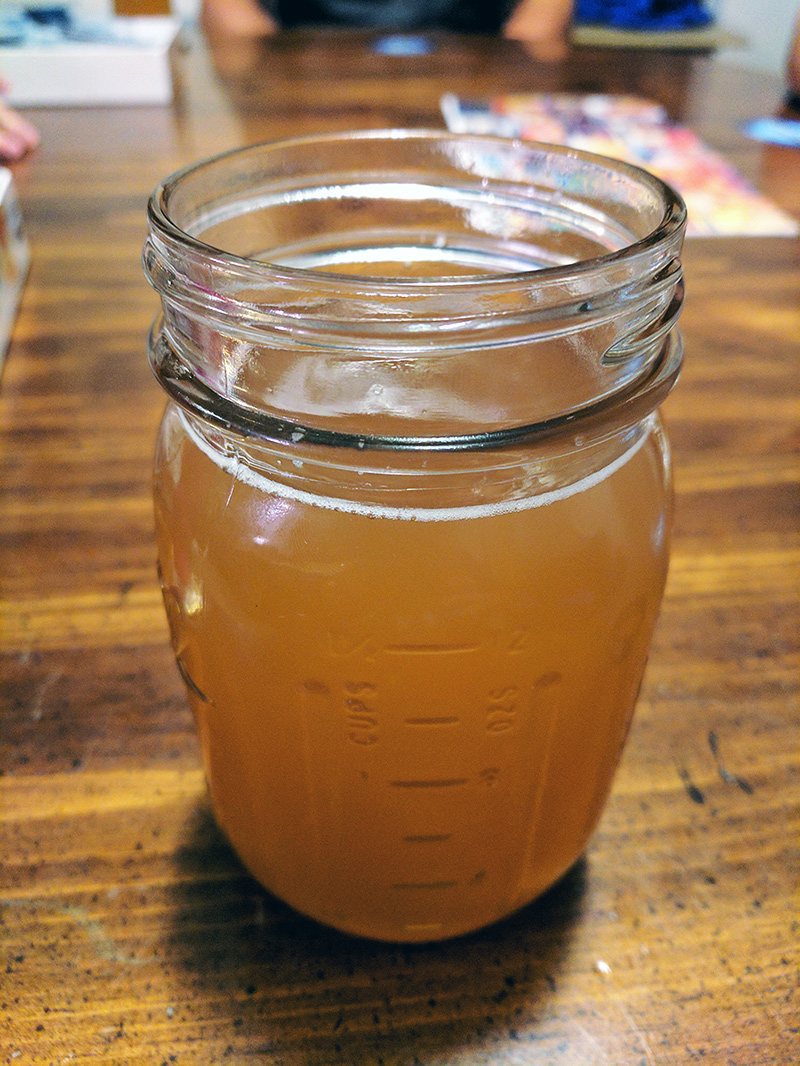
After a FULL 36 hours (if forced carbonating), you’re ready to drink. I want to add a note of how important it is to wait the full 36 hours for carbonation. I pulled my first beer (Coronado Stingray IPA) after 24 hours because I was leaving for a camping trip and, while the beer tasted great, it was pretty flat. Here’s a picture of my first pour from only 24 hours of carbonating – you can see there is pretty much no head on it.
My second brew was Pico’s Half Squeezed IPA – I let this carbonate the full 36 hours and it was much better. The final 12 hours really makes a world of difference.

Final Thoughts on this Pico Review
Overall, I think PicoBrew really put together an impressive product that has the chance at changing the way homebrewed beer is made around the world. The idea of automating brewing is relatively new to the market, and as one of the pioneers in this space, I think PicoBrew hit a homerun simply because it works. The beer tastes great, and you have the opportunity to try beers from the other side of the country, in your own home.
Many enthusiasts dislike the product and auto brewing industry all together because it takes away from some of the hands-on aspects and promotes “keurig” type products. The reality is that this is hardly close to a fully automated product. This product really only assists with the beginning brewing stages, such as mashing and hopping, by maintaining precise temperatures. Fermenting, racking, and carbonating all have to be done on your own.
My bottom line is this: if you’re looking to get into home brewing but have been hesitant to jump because it seems a bit overwhelming, this product may be an excellent entry point to a rewarding hobby. The price is up there, but I am a 100% satisfied user and will continue brewing with my Pico.
0 Comments
PicoStill Review: Distilling Attachment for Everything… Except Liquor - Brew Fuse
[…] designed the PicoStill to be inter-compatible with all of their automated brewing machines including Pico Pro/Pico C, Zymatic, and Z […]
Could This New Countertops Device Turn The Beer Industry On Its Head? Brewing System | Maine Stones
[…] PicoBrew PICO Model C Beer Brewing Appliance X X Black – brewfuse.com […]